
The tutorial uses the following files:
•SAMPLE30.OLR
•PrjA_Add2ndCkt.ADX
•PrjB_UpgradeConductor.ADX
•PrjC_AddIBRInterconnect.ADX
To follow along with this tutorial, you may need to specify different file paths depending the specific read/write permissions assigned to your user account on your computer.
1. Launch ModelBuilder.exe.
2. Select the File | New Build Plan command.
Note: To select this command you first click the left mouse button on 'File' to open its pull down menu. Then click the left mouse button on 'New Build Plan'.
A dialog box will appear asking you to name the Build Plan data file that you want to create and to specify the Work Folder where Model Builder will store files for the Build Plan.
3. Select the Edit | New Build Plan command.
A dialog box will appear asking you to name the Build Plan data file that you want to create and to specify the Work Folder where Model Builder will store files for the Build Plan.
3. Select the Edit | Add New Seed Case command.
A dialog box will appear asking you to select a OneLiner file (.OLR) that will be the seed case for the Build Plan. Select the Sample30.OLR file.
4. Select the Edit | Add Change File command.
A dialog box will appear asking you to select one or more ASPEN Change Files (.CHF, .ADX, .PJX) containing the changes to apply to the seed case. Select the three project files for this example:
(1) PrjC_AddIBRInterconnect.ADX
(2) PrjA_Add2ndCkt.ADX
(3) PrjB_UpgradeConductor.ADX
A notice will appear to let you know that each .ADX file will be converted to the .PJX format. Click Yes to All.

You should now see the following Build Plan within ASPEN Model Builder.

5. Select the Build | Build command.
A notice will appear that the changes must be saved before building. Click OK.

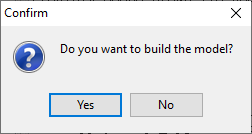
A notice will appear asking to confirm that you want to build the model. This confirmation is here to prevent accidental rebuilt of a very large Build Plan. Click Yes.
6. View the Build Summary spreadsheet.
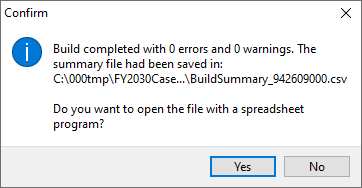
After the build is complete, you will see a message asking whether you want to view the Build Summary spreadsheet. Click Yes.
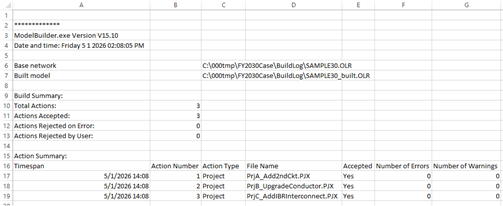
The build summary provides a high level overview of the entire build. For this example, it should look similar to the following.
7. Open the Built model using OneLiner.
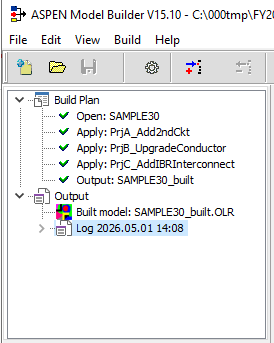
Return to the Model Builder program. The Build Plan now shows green check marks next to each item, indicating the step was successful. The Output section now has a Built model: SAMPLE30_built.OLR. This OneLiner file should contain a new version of the seed case with the projects applied. Double-click the Built model: SAMPLE30_build.OLR file within the Output section of the left pane of Model Builder. The file will be opened in OneLiner.
8. Select the File | Save command.
The Build Plan serves as a complete record of the model build.
9. Select the File | Exit command.
This will close the ASPEN Model Builder program.